Building a ChatBot on your Data or to crawl and answer questions on your website has never been easier. In less than 10 minutes you can have your ChatBot Answering questions on your services, products and data.
We are going to build a ChatBot that connects to your Website data, but you can add additional datasets to the repository.
If you haven't already - sign up for Google Cloud - cloud.google.com you may need a google workspace - sign up if you don't .
For a step-by-step video tutorial check out: https://youtu.be/zzVw-w5j5Bg
Creating your ChatBot that uses Gemini and your data
Open up your Google Cloud console and find the Search and Conversation page.
Create a New Project or Select your project from drop-down.
Agree to the Terms of Service, then click Continue and activate the API.
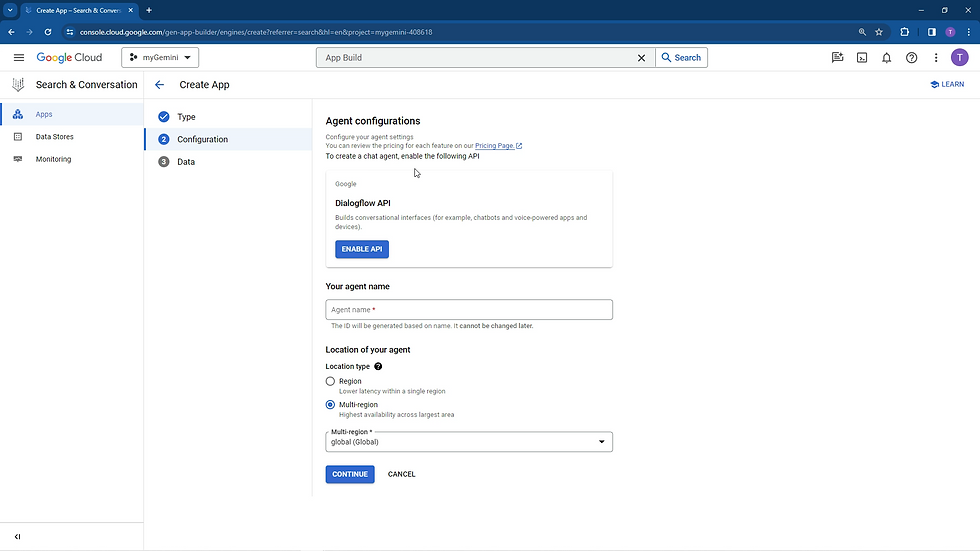
Click Create a New App
Select the option for Chat.

Provide your company name in the Agent configurations section. eg: 1stForData.com
Change the time zone and language settings
Provide an ChatBot name in the Your agent name section. eg: Talulah the ChatBot
Select region in the Location of your agent section. eg: multi-region
Click Continue.

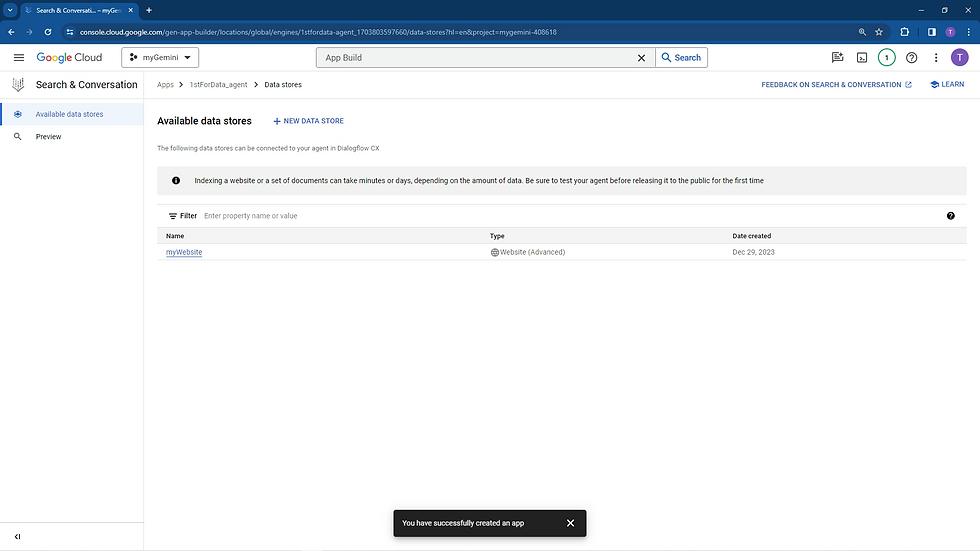
You now need to have a data source of some sort so your chatBot knows what it is looking for:
Click Create New Data Store.
Choose a data source as a Webstite URLs - this scans your webpage
Pop in your website name eg: *.1stfordata.com/*
Then make a Datastore name eg: mywebdata
Click Create to create the data store.
Tick or Select your data store.
Once the Datastore is available then you click Create.

To open and fine-tune your ChatBot with Dialogflow, click Preview in the left panel.
Test your ChatBot
To Note: It can take a number of hours for your data to be indexed and available in the chatBot. Testing is best started the next day.
Once you have your App ready, it is now time to test the ChatBot - click on the Preview button on the left pane.
Fine Tune and Improve the ChatBots responses
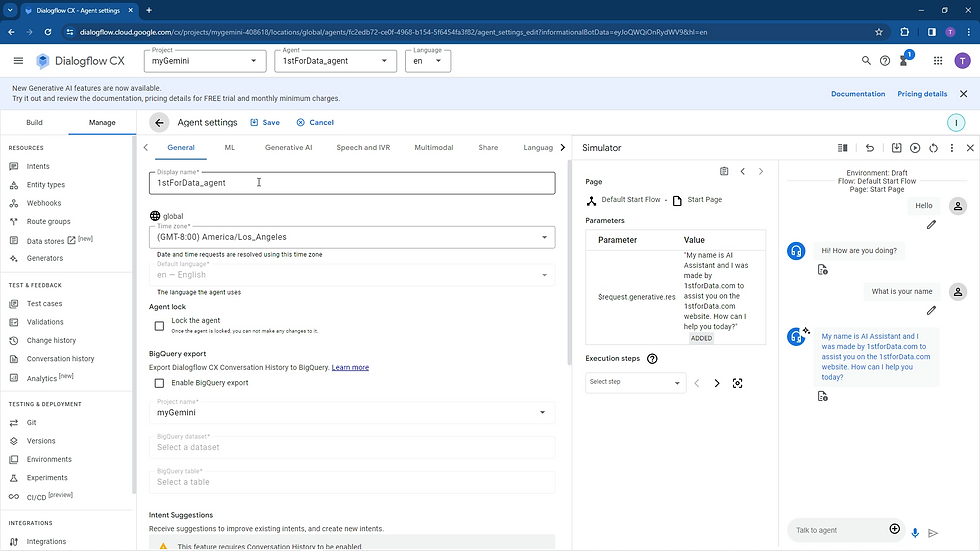
Once you have opened the preview it directs your to Dialogflow CX interface. Select Agent Settings on the right side, and click the ML tab, and also the Generative AI tabs.
ChatBot prompt and interface the user sees
In the General Tab, Enable the BigQuery Export.

Update the relevant information and you can see what it will display on the right.
To Change the LLM on the ChatBot go to the Generative AI tab, and select from the drop down of the available LLMS.
Options:
text-bison@00x
text-bison@001 tuned (conversation)
gemini-pro
Deploy your ChatBot
Click the Publish button on the DialogFlow CX
Choose the Enable the API (Private or Public)
Select the view and then click enable
Embed the code into your website

Comments